
Happy Wednesday book friends! If you’re having a sense of deja vu, that’s entirely possible, because I did a post like this not too long ago. However, I think it looks a little too cluttered, and I learned some new stuff in the meantime! So here’s an entirely new post.
Just like in my previous post, some of these tips I learned from Aimee Always, but it seems she has deleted her site, so I can’t link it. Anyway, below you can find some of the HTML basics, and some more technical stuff! I have now added a handy-dandy menu below, so you can directly go to what you want to learn more about. Of course I’ll also include how to make such a menu.
HTML basicsHeaders
Making text a different color
Inserting a link
Using HTML for blockquotes
Using HTML to create buttons
Inserting an image
Making a drop down menu
Linking within a post

HTML Basics
A lot of you will probably already know these things, but it’s handy to have them nearby because you can incorporate them into slightly more complicated HTML codes!
<b> … </b> – This makes you text bold
<i> … </i> – This makes your text italic
<u> … </u> – This will underline your text
<p> … </p> – Will start and end a paragraph
<br> … </br> – This will indicate a line break
<h2> … </h2> – This indicates an H2 level header. Obviously you can interchange the 2 for a 3 or 4 as well if you want to use smaller headers!
<center> … </center> – Center your text or image, or even your GIFS!
Headers
I love using HTML headers now that I know how to use them. You can play around with the font size, the font family, and all the colors on the spectrum! Using large, colored headers will definitely make your blog post pop. And it makes posts easier to read too, in my opinion. Anyway, here is how I build my headers:
Tip: the text in brown is what you can change to your liking! I find it easiest to put in the colors in hex code form, so don’t forget to add the #!

Making text a different color
If you want to change the color of one or two words, this simple code will do the trick! You can also insert basic HTML components here to make the text bold or italic. In this case simply insert the code around “YOUR TEXT.”

Inserting a link
One of my biggest annoyances with the early version of WordPress I had, was that I couldn’t customize links to my liking. Now that I have a paid template, it’s less of an issue, but it’s still nice do manually insert links! Plus, it’s one of the easiest things to do in HTML.

Using HTML for blockquotes
If you read my posts often, you know how much I love using blockquotes. I use them as blurb boxes, and to spice up list posts. The padding is essentially how much space will surround the blockquote. I have mine set to 20px, but I encourage you to experiment with other sizes to figure out what you like best!

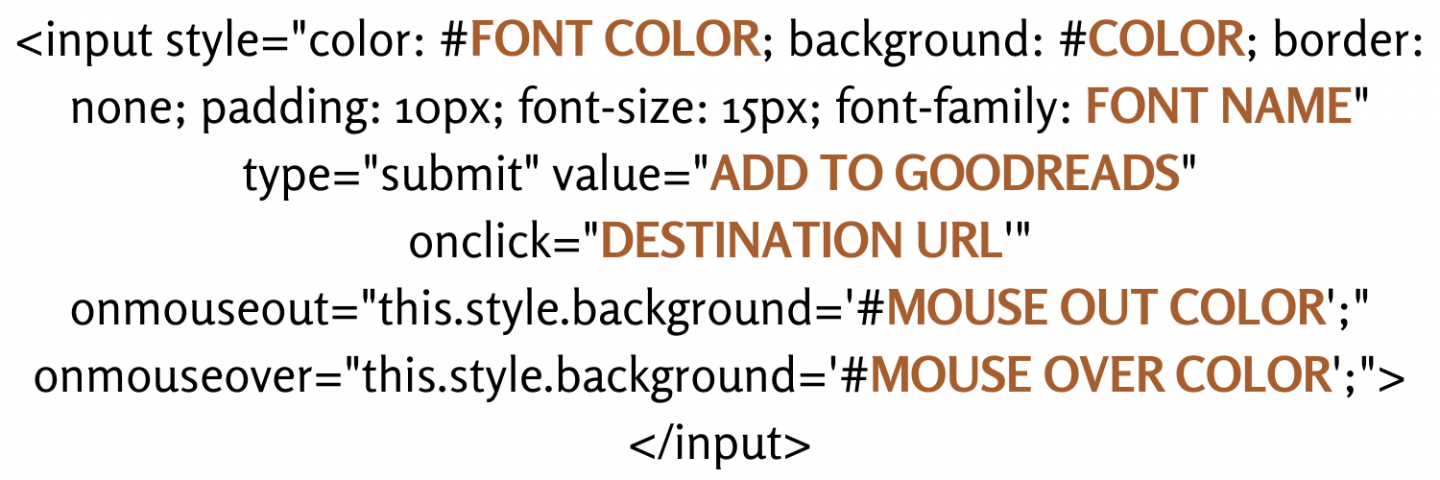
Using HTML to create buttons
This is by far my favorite HTML trick to use. I love using buttons to link to other pages, because it makes my blog look so professional. Almost like I’m smart. I use buttons to link books I’m talking about to Goodreads and The Story Graph, but you can use any external site you want! Endless possibilities!! This code is a little longer, so be sure to be precise in your copying.
Inserting an image
Uploading every single image to your media library takes up a lot of space. Image URLs are the perfect solution! I always use image URLs when inserting a book cover, because… why would I want to keep a book cover in my library in the first place?? Of course, WordPress allows you to insert images as well, but I just like using HTML. “hspace” means how much white space will be left on the left and right side of the image. Again, you can experiment with the number here!

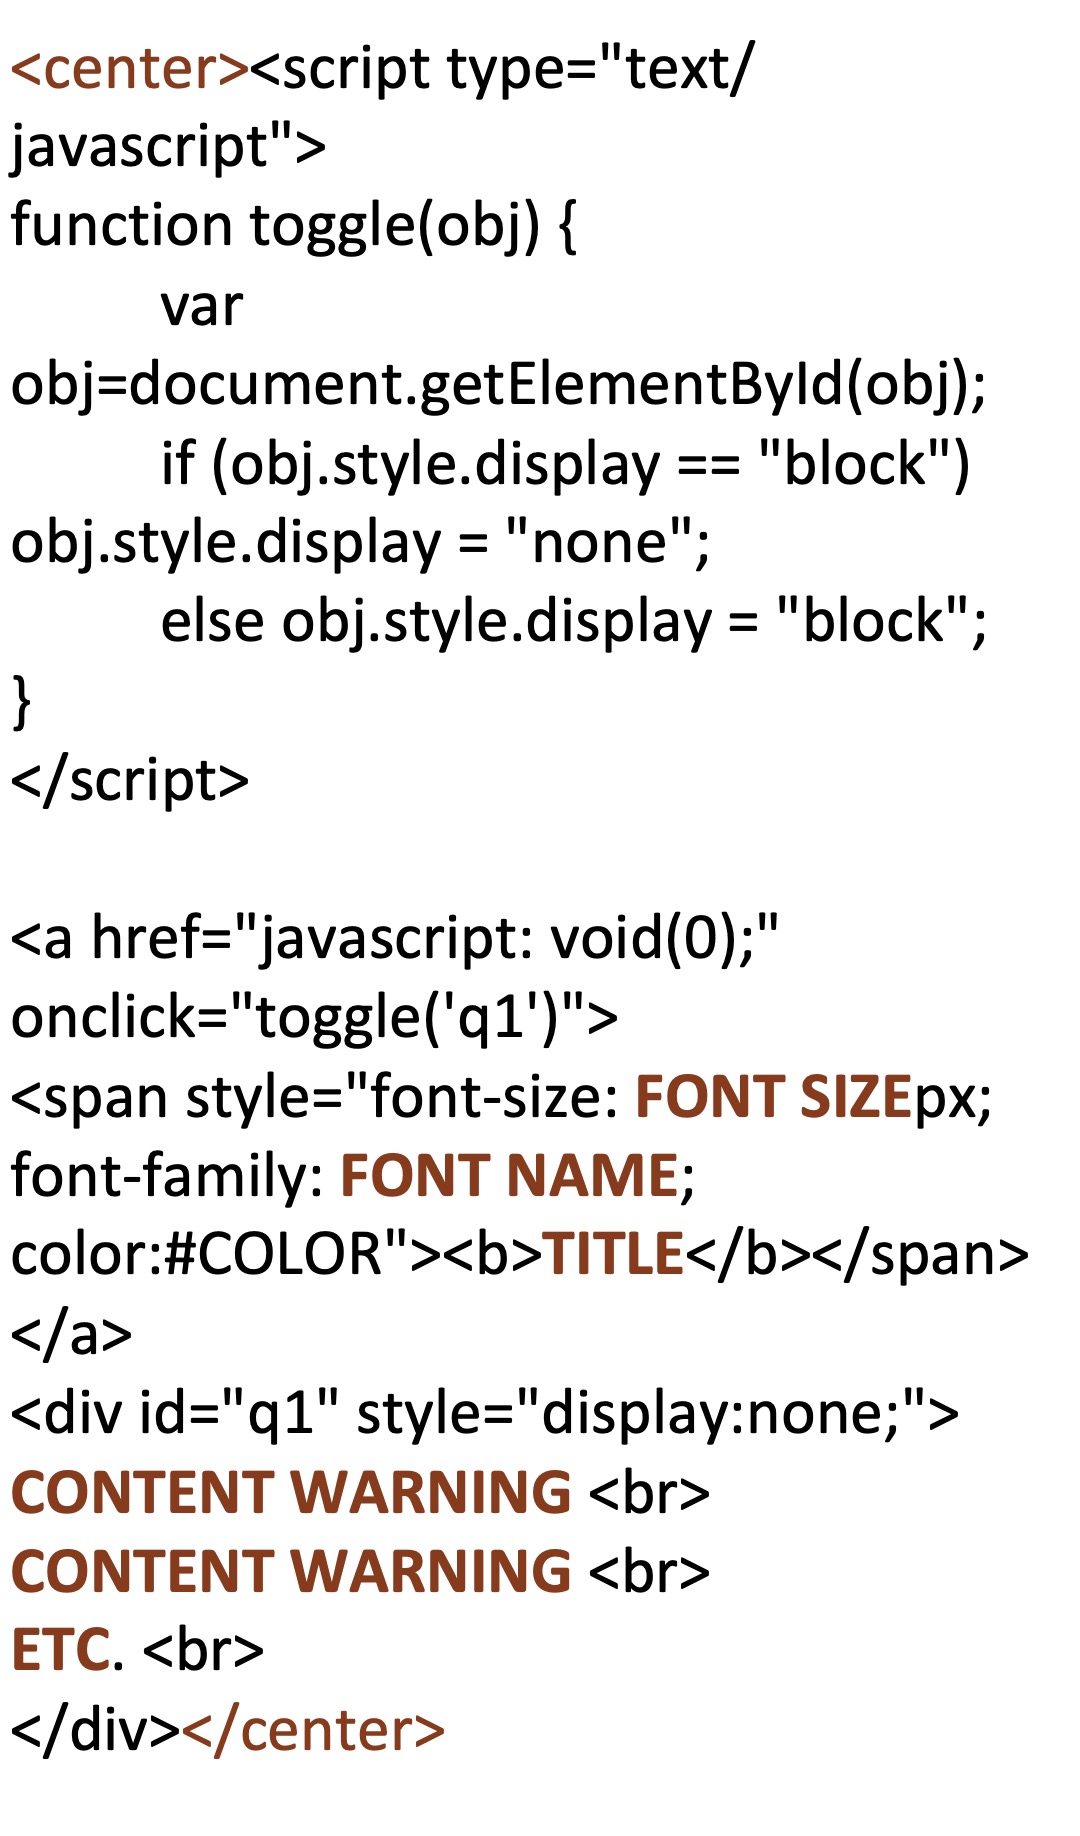
Making a drop down menu
Recently I started adding content warning to the top of my review posts. I place the content warnings at the top, so that those who want to see them can immediately choose to do so without having the scroll all the way to the bottom. But I also realize that not everyone wants to see content warnings. So a hidden drop down menu was the perfect solution, and here is who you can do it!
Linking within a post
Lastly, if you’re making long posts like this one, being able to link within your post is a good skill to have. I also used it in my 2021 Most Anticipated Releases post. Readers can now click on a month, and be taken further down to read about releases for that month. This code comes in two parts, so be sure to always complete both steps or else it won’t work. Here’s how to do it:

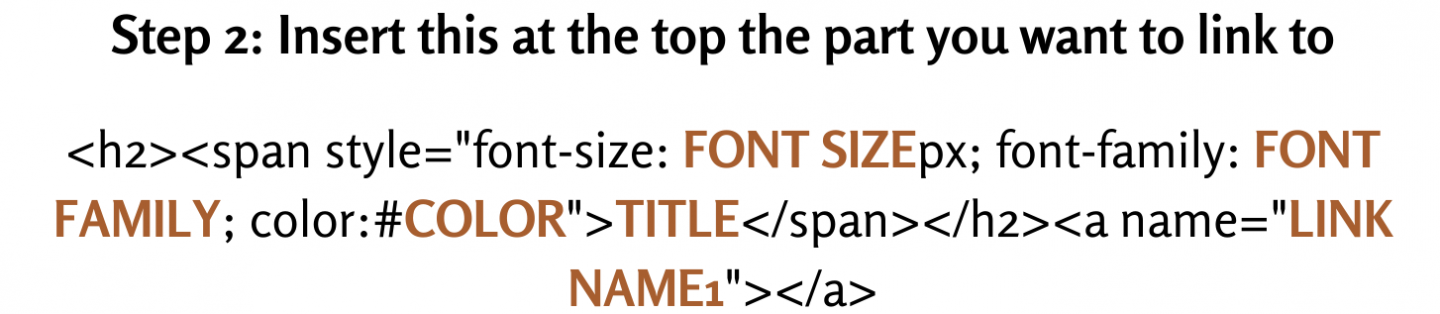
As you can see, you need to make sure that the names of both links are the same. I’ve been finding this skill super handy lately, and I’m going to keep using it in longer posts.
And that’s it! I hope you found this post useful. All these lines can look kind of daunting at first, but once you’ve used one you can copy-paste it to other posts as well. That’s how I’m still able to write my posts super quick, hihi.


The inserting button one! I always want to insert one but have never bothered looking into how lol I might have to start using that! Thanks for the tips 🙂
Author
I’m glad you found them useful! Let me know if you encounter any problems, because I formatted the lines weird ??